Tools
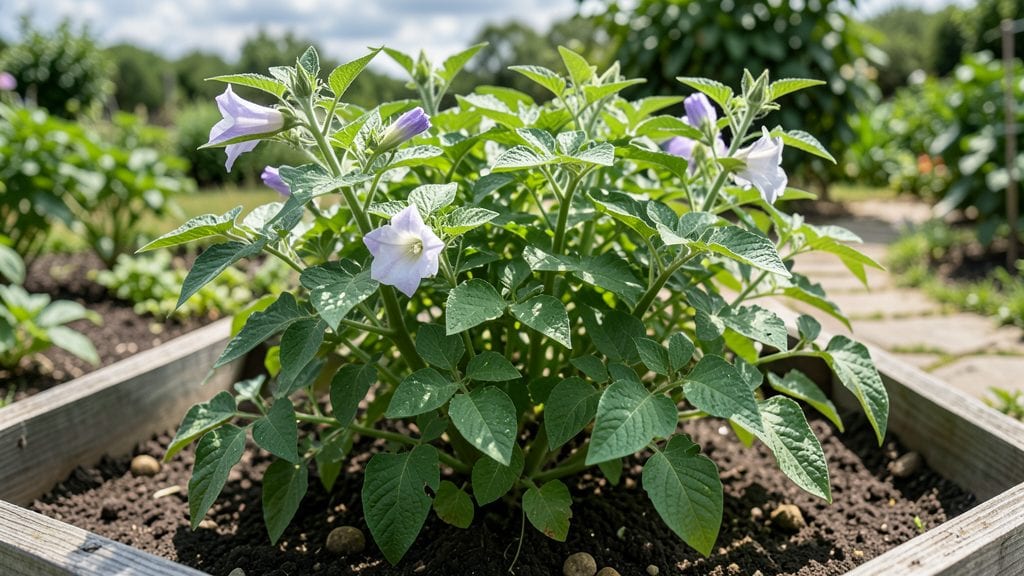
A potato garden bed in containers turns even a tiny balcony into a year-round harvest factory—no dirt, no weeds, just pure potato power.
I started with two 5-gallon buckets and a handful of seed potatoes, and now I’m growing enough for home fries and mashed potatoes without stepping foot in the yard. The best part? You can stack them vertically, saving space while maximizing yield.
This setup works because potatoes thrive in deep, loose soil where tubers can swell without restriction. I use a mix of coconut coir, compost, and perlite to keep it airy, and add a slow-release fertilizer at planting time.
Companion plants like thyme or marigolds around the base deter pests naturally while adding fragrance. The key is spacing: plant seed potatoes 6 inches apart in each container, leaving 12 inches between buckets for airflow.
By midsummer, you’ll be harvesting baby potatoes straight from the container—no digging required. The plants grow tall and leafy, and when you’re ready for full-sized spuds, you can either empty the container or let the soil break down naturally.
The real magic happens when you stack containers vertically: what starts as a 2-foot-tall setup ends up yielding 20-30 pounds of potatoes in a 4x4-foot footprint.
Perfect for urban gardeners, small spaces, or anyone tired of store-bought potatoes. The same principles work for sweet potatoes too—just adjust the soil mix and planting depth. Here’s how to design yours for maximum flavor and yield.
📚 In This Guide
- What you need
- Instructions
- Tips and common mistakes
- Wrapping up and next steps
What you need
- ● Container or Raised Bed: Minimum 12 inches deep (deeper is better for larger potatoes).
- ● Width: 12–18 inches (allows for easy access and airflow).
- ● Material: Wood, fabric (like Grow Bags), or plastic (ensure drainage holes are present or drilled).
- ● Quantity: 1–2 containers per 10–15 plants (depending on variety).
- ● Potting Mix or Soil: Well-draining, loose soil (avoid garden soil—it compacts too easily).
- ● Mix: 50% potting soil + 50% compost or coconut coir (add perlite or vermiculite for extra drainage).
- ● Quantity: Enough to fill your container 2/3 full (top off with more as plants grow).
- ● Potato Seeds or Seed Potatoes: Certified disease-free seed potatoes (avoid grocery store potatoes—they’re treated to prevent sprouting!).
- ● Quantity: 1–2 seed potatoes per container (cut into chunks with at least 1–2 eyes each; let cuttings heal for 1–2 days before planting).
- ● Drainage Layer: Gravel, pebbles, or broken pottery (1–2 inches at the bottom of the container).
- ● Watering Can or Hose with Nozzle: Even, gentle watering is key—avoid soaking the soil.
- ○ Fertilizer (Optional but Recommended): Balanced, slow-release fertilizer (e.g., 10-10-10 or organic options like fish emulsion).
- ● Apply at planting and mid-season (follow package instructions).
- ● Mulch: Straw or shredded leaves to retain moisture and regulate soil temperature.
- ● Support Stakes or Trellis: For vining varieties (like fingerlings), to save space and improve airflow.
- ● Soil pH Test Kit: Potatoes prefer pH 5.0–6.5; amend soil if needed (e.g., sulfur to lower pH).
- ● Garden Gloves: Protect your hands from prickly potato stems and soil-borne pathogens.
- ● Harvest Knife or Small Trowel: For gentle digging when it’s time to harvest.
- ● Shade Cloth: If growing in hot climates, to protect plants from wilting.
Step-by-Step instructions for building a year-round potato garden bed in containers
Transform any space into a high-yield potato patch using containers—no yard required.
Select and Prepare Containers for Optimal Growth
Choose 5-gallon buckets or fabric grow bags at least 12 inches deep—shallow containers stunt root development. Drill drainage holes in the bottom if using plastic, as potatoes rot in soggy soil. I prefer fabric grow bags because their breathable walls prevent waterlogging while allowing roots to spread naturally.
Line the bottom of each container with 2-3 inches of cardboard to mimic natural soil layers and encourage root expansion. This also prevents soil from washing out through the drainage holes. For 4 plants, you’ll need 4 containers—one per potato variety if you’re growing multiple types.
Layer Soil and Plant Seed Potatoes Strategically
Fill each container with 3 gallons of potting mix mixed with 1 gallon of compost—this ensures loose, fertile soil that potatoes love. Leave 2 inches of space at the top for future hilling. Plant 1 seed potato per container, placing it 4 inches deep with the eyes (sprouts) facing upward. If your seed potatoes are large, cut them into chunks with 2-3 eyes each, letting the cut sides heal for 24 hours before planting.
Cover the seed potato with 2 inches of soil, then water gently until the soil is evenly moist but not saturated. The key here is patience—wait until sprouts emerge (about 10-14 days) before adding more soil. This ensures roots establish before being buried deeper.
Hill Soil Gradually as Plants Mature
When sprouts reach 6 inches tall, add 2 more inches of soil around the stem, leaving the top 2 inches of the plant exposed. Repeat this process every 2 weeks until the container is full. Hilling encourages more tuber formation by covering the stems, which signals the plant to produce additional potatoes underground. You’ll know you’ve done it right when the soil mound reaches the rim of the container.
Water deeply after each hilling to settle the soil and eliminate air pockets. Avoid overhead watering—it spreads disease. Instead, use a watering wand to direct moisture at the base. By the time the plants flower, your containers should be completely filled with soil, with only the top leaves visible.
Manage Light, Water, and Harvest for Maximum Yield
Potatoes need full sun (6-8 hours daily)—place containers where they’ll receive unfiltered light. If growing indoors, supplement with a grow light kept 6 inches above the plants for 12-14 hours daily. Yellowing leaves or stems leaning toward light mean your setup isn’t getting enough brightness.
Water when the top inch of soil feels dry, aiming for 1-1.5 gallons per container weekly. Overwatering causes rot, while underwatering stunts growth. Harvest new potatoes by gently sifting through the soil when flowers appear (about 8-10 weeks). For full-sized potatoes, wait until foliage yellows and dies back (typically 12-16 weeks).
Extend the Harvest Season with Successive Plantings
For a year-round supply, stagger plantings every 2-3 weeks in spring and summer. Early varieties like ‘Yukon Gold’ mature in 90 days, while late varieties like ‘Russet’ take 120 days. After harvesting, sterilize containers with a 10% bleach solution to prevent disease before replanting.
In fall and winter, grow cold-hardy varieties like ‘Red Pontiac’ in a cool greenhouse or unheated garage with grow lights. Reduce watering slightly in winter, as potatoes go dormant in cooler temperatures. With this method, you’ll have fresh potatoes ready year-round—no grocery store needed.
Tips & tricks for building a year-round potato garden bed in containers
A few strategic adjustments will help you maximize your container potato garden's potential and avoid common pitfalls that can derail your harvest.
Container Selection Matters: While 5-gallon buckets and fabric grow bags work well, consider adding handles to buckets for easier mobility—you'll need to rotate containers every few weeks to ensure even sunlight exposure. For urban balconies, choose containers with built-in wheels to simplify repositioning. The 12-inch depth requirement is non-negotiable, but you can stack containers vertically to save space while maintaining proper root development.
Soil Layering Technique: When creating your 3-gallon potting mix and 1-gallon compost blend, incorporate a handful of perlite or vermiculite into each container. This improves drainage and aeration, preventing the compacted soil that often leads to rot in container gardens. In Step 2, after planting your seed potatoes 4 inches deep, consider adding a thin layer of straw mulch (about 1/4 inch) on top of the initial 2-inch soil layer—this helps retain moisture while preventing crusting that can inhibit sprout emergence.
Hilling with Precision: The 2-week hilling interval in Step 3 works best when you use a ruler to measure exactly 2 inches of soil each time. This consistent approach ensures you're maintaining the proper stem exposure while encouraging tuber formation. I've found that using a small shovel with marked measurements makes this process much more accurate. When the soil mound reaches the container rim, you'll know you've created the ideal environment for maximum tuber production—just be sure to leave those top 2 inches of plant exposed to prevent rot.
Light Management Strategy: For indoor grow lights, position them on adjustable arms so you can maintain that crucial 6-inch distance as plants grow taller. The 12-14 hours of daily light is essential, but don't forget to rotate containers 180 degrees every 2-3 days to prevent uneven growth toward the light source. In Step 4, watch for those yellowing leaves—this is your plant's way of telling you it needs more light, not necessarily more water.
Pro Tips for Potato Garden Bed
- A few strategic adjustments will help you maximize your container potato garden's potential and avoid common pitfalls that can derail your harvest.
- For urban balconies, choose containers with built-in wheels to simplify repositioning.
- Soil Layering Technique: When creating your 3-gallon potting mix and 1-gallon compost blend, incorporate a handful of perlite or vermiculite into each container.
Frequently asked questions
How deep should a potato garden bed be?
Aim for a depth of at least 12–18 inches to accommodate potato growth. Containers or raised beds should have 10–12 inches of soil to allow tubers room to expand. If using bags or barrels, ensure they’re tall enough—potatoes can grow up to 2 feet deep!
When is the best time to plant potatoes in containers?
For a spring harvest, plant 2–3 weeks before your last frost date. For a fall harvest, try planting 4–6 weeks before the first frost. Potatoes thrive in cool soil (50–60°F), so avoid planting when temps are too warm—wait until nighttime lows are below 50°F.
How do I prevent pests like wireworms or Colorado potato beetles?
Start with healthy seed potatoes (certified disease-free). Use row covers early in the season to block beetles, and crop rotation if reusing beds. For wireworms, add compost or aged manure to improve soil health—they hate well-drained, fertile soil!
Can I grow potatoes in containers without a dedicated garden bed?
Use 5-gallon buckets, grow bags, or even large fabric pots (at least 12" deep). Just ensure they have drainage holes and enough space for 2–3 plants per container. Dwarf varieties like ‘Yukon Gold’ or ‘Red Pontiac’ work best in tight spaces.
What do I do if my potato plants turn yellow or wilt?
Yellowing leaves often mean too much sun or overwatering. Wilting could signal blight, pests, or root rot. Check soil moisture—potatoes need 1–1.5 inches of water weekly. If blight appears (brown spots), remove affected plants immediately and avoid watering foliage.
Wrapping up and next steps
Creating a potato garden bed in containers is a game-changer for urban gardeners or those with limited space—it’s simple, rewarding, and endlessly adaptable! 🌱 Whether you’re growing spuds for crispy fries, hearty mashed potatoes, or fresh salads, this method ensures a bountiful harvest year-round with minimal fuss.
The key? Patience, proper layering, and a little creativity—and you’ll be feasting on homegrown goodness in no time.
Ready to dig in? Start small with one container, experiment with varieties, and soon you’ll be expanding your potato patch like a pro. Happy planting, and may your harvests be plentiful! 🥔✨