
Vegetables
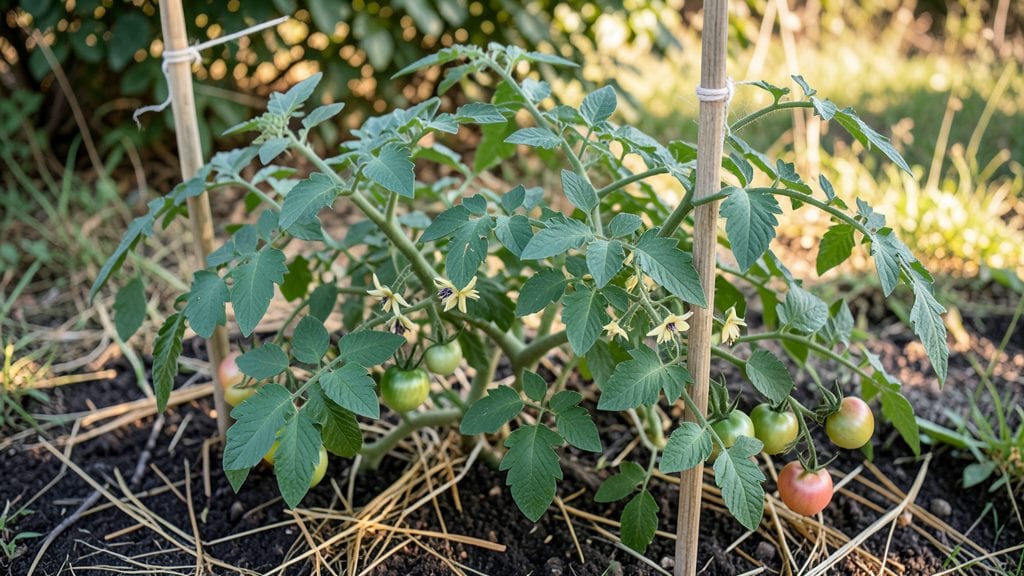
Raised vegetable gardening turned my cramped city balcony into a space-efficient harvest hub—where every inch works harder than a traditional in-ground plot.
The key isn’t just the soil or plants, but how you arrange them: tall beans climbing trellises in back corners, shallow lettuces in front, and herbs spilling over edges like a living border.
My first layout produced twice the yield in half the space, and the design made weeding feel like a game instead of a chore.
You don’t need fancy tools—just a few 4x8-foot frames, some lumber, and a clear vision of what you’ll actually eat.
French intensive strips, square-foot grids, or spiral designs all work, but the real magic happens when you group plants by their needs: sun-lovers together, water-thrifty varieties near pathways, and shade-tolerant greens where taller crops cast dappled shadows.
My 3x6-foot raised bed now grows enough tomatoes, peppers, and greens for four people, and it fits snugly against my apartment wall.
By summer’s end, you’ll be harvesting vibrant green beans that snap fresh from the vine, deep-red cherry tomatoes bursting with juice, and herbs so fragrant they make the whole neighborhood stop and sniff.
The best part? No more bending over muddy soil or fighting weeds—just a neatly organized, high-yielding system that looks as good as it performs. Let’s design yours so it’s both beautiful and bountiful.
Works for balconies, patios, or backyards—the principles scale down to window boxes or up to full raised-bed gardens. The only rule? Start small, sketch it out first, and plant what you’ll actually use. That’s how you turn dirt into dinner without the drama.
📚 In This Guide
- What you need
- Instructions
- Tips and common mistakes
- Wrapping up and next steps
What you need
- ● Raised Bed Frame: Wooden frames (cedar or redwood, untreated, 2x6 or 2x8 boards, 8–12 ft long)
- ● OR Pre-made raised beds (plastic, metal, or composite, 2–4 ft wide, 6–12 in deep)
- ● Garden Fabric or Landscape Fabric: 1 roll (to suppress weeds)
- ● Quality Soil: 60% topsoil
- ● 30% compost
- ● 10% perlite or vermiculite (for drainage)
- ● Organic Mulch: Straw, wood chips, or shredded leaves (2–3 inches)
- ● Basic Hand Tools: Garden trowel
- ● Hand pruners
- ● Garden fork (for turning soil)
- ● Drip irrigation kit or soaker hoses (for efficient watering)
- ● Compost bin (to recycle kitchen scraps into nutrient-rich soil)
- ● Garden kneeler or stool (for comfort during planting)
- ● Plant markers (to label your veggies)
- ● Gloves (to protect your hands)
- ● Seedling trays or biodegradable pots (for starting plants indoors)
- ● A sunny spot with 6–8 hours of direct sunlight daily.
- ● Access to water (a hose or watering can within reach).
- ● Basic knowledge of your USDA hardiness zone (check here).
- ● Time to dedicate 10–30 minutes daily for watering, weeding, and maintenance.
Step-by-step instructions for designing space-saving raised vegetable gardens
Transform even the smallest yard into a productive growing space with these proven layouts.
Plan Your Raised Bed Dimensions and Layout
Start by measuring your available space and sketching a rough layout. I recommend 4-foot-wide beds—this width allows you to reach the center without stepping on the soil, which compacts it and harms roots. For a 4-foot-by-8-foot bed, you’ll have about 27 square feet of growing space, enough for 4 servings of vegetables. Place beds along a fence or wall to maximize sun exposure and minimize watering needs.
Consider the sun’s path when positioning your beds. Most vegetables need 6-8 hours of direct sunlight daily, so orient the long side north-to-south in the Northern Hemisphere. This ensures even light distribution and prevents shading from taller plants. If your space is limited, opt for vertical growing structures like trellises for vining plants such as cucumbers or pole beans.
Choose Compatible Plant Pairings for Efficient Use
Group plants with similar sunlight, water, and nutrient needs together to simplify care. For example, pair tomatoes, basil, and peppers—all of which thrive in full sun and prefer well-draining soil. Avoid planting heavy feeders like tomatoes next to light feeders like lettuce, as they’ll compete for nutrients. I like to use the "square foot gardening" method for small spaces: divide your bed into a grid and allocate 1 square foot per plant based on its mature size.
Interplant fast-growing crops like radishes or lettuce with slower-maturing plants such as carrots or onions. This ensures you’re always harvesting something without leaving gaps. For instance, sow radishes in the same row as carrots—the radishes will be ready in 3-4 weeks, leaving space for the carrots to fill in. This technique maximizes yield in tight spaces.
Build or Assemble Your Raised Bed Frame
Construct your raised bed using rot-resistant lumber like cedar or redwood, or opt for pre-made kits for simplicity. For a 4-foot-by-8-foot bed, use 2-by-6 boards for the sides, ensuring the frame is at least 6 inches deep to accommodate root growth. Line the bottom with landscape fabric to suppress weeds and prevent soil from mixing with native ground. If using untreated wood, apply a non-toxic sealant to extend its lifespan.
Leave a 2-inch gap between the bed frame and any permanent structures like fences or decks to improve airflow and reduce moisture buildup. Fill the bed with a loose, well-draining mix of 50% topsoil, 30% compost, and 20% perlite or vermiculite to create an ideal growing medium. Avoid garden soil from your yard, as it often compacts and lacks the nutrients raised beds need.
Plant Using Succession and Spacing Guidelines
Begin by planting larger, slower-growing vegetables like tomatoes or peppers at the edges of the bed, where they won’t shade smaller plants. Space these 18-24 inches apart to allow for airflow and future growth. For smaller plants like lettuce or herbs, use 6-12 inches of spacing between each. Mark planting locations with toothpicks or small stakes to avoid overcrowding, which can lead to disease.
Use succession planting to extend your harvest. After harvesting early crops like radishes or spinach, replant the space with bush beans or kale, which mature more slowly. This keeps your garden productive throughout the season. Water deeply after planting to settle the soil around roots, and apply a 1-inch layer of mulch to retain moisture and suppress weeds.
Maintain with Consistent Care and Adjustments
Water your raised bed 1-2 inches per week, either through rainfall or irrigation. Raised beds dry out faster than in-ground gardens, so check the top 2 inches of soil daily during hot weather. Use a drip irrigation system or soaker hose to deliver water directly to the roots, reducing evaporation and disease risk. Avoid overhead watering, which can spread fungal spores.
Fertilize every 4-6 weeks with a balanced organic fertilizer or compost tea to replenish nutrients. Monitor your plants weekly for pests or diseases, and address issues early—neem oil or insecticidal soap are effective organic solutions for common problems. Rotate crops annually to prevent soil depletion and reduce pest buildup, especially in small spaces where the same plants are replanted yearly.
Tips & tricks for perfect raised vegetable garden layouts
A few strategic adjustments can transform your small space into a highly productive raised garden. These insights will help you maximize every square foot while avoiding common pitfalls that waste potential.
Sunlight Optimization: When positioning your 4-foot-by-8-foot bed, verify the sun’s path throughout the day—not just at noon. I’ve seen gardens fail because the morning sun was blocked by a fence, leaving afternoon shade. Place taller plants like tomatoes on the north side (in the Northern Hemisphere) to prevent them from casting shadows over shorter crops. For vertical plants such as cucumbers or pole beans, install trellises along the east side to capture morning light, which is often more intense and beneficial for photosynthesis.
Soil Mix Precision: The 50-30-20 soil ratio (topsoil, compost, perlite/vermiculite) is ideal, but don’t skimp on quality. I recommend using a high-quality topsoil with a pH of 6.0-7.0 and compost that’s fully decomposed—partially rotted material can burn young roots. For the perlite or vermiculite, ensure it’s clean and free of contaminants, as some garden centers sell reused materials that may harbor pathogens. This careful layering prevents compaction and ensures proper drainage, which is critical for root health in raised beds.
Succession Planting Strategy: The 3-4 week window for radishes is your best friend for maximizing space. I’ve found that planting radishes every 10 days in the same row with carrots creates a continuous harvest cycle. After the radishes are pulled, the carrots have ample room to fill in without competition. For a visual guide, use colored toothpicks to mark planting dates—this helps track which crops are ready to harvest and which spaces are available for replanting.
Maintenance Shortcuts: Instead of checking soil moisture daily, install a simple moisture sensor about 2 inches deep in the bed. These cost less than $10 and eliminate the guesswork, especially during hot weather when raised beds dry out quickly. For fertilizing, I’ve switched to a slow-release organic fertilizer applied at planting time, reducing the need for frequent 4-6 week applications. This method maintains consistent nutrient levels without the risk of over-fertilizing, which can lead to leafy growth at the expense of fruit production.
Pro Tips for R Vegetable Gardening
- A few strategic adjustments can transform your small space into a highly productive raised garden.
- Sunlight Optimization: When positioning your 4-foot-by-8-foot bed, verify the sun’s path throughout the day—not just at noon.
- Soil Mix Precision: The 50-30-20 soil ratio (topsoil, compost, perlite/vermiculite) is ideal, but don’t skimp on quality.
Frequently asked questions
Got questions about raised vegetable gardening? You’re not alone! Here are some of the most common queries—plus straightforward answers to help you grow like a pro.
What’s the best soil mix for a raised vegetable bed?
A balanced blend is key: 60% topsoil, 30% compost, and 10% perlite or vermiculite for drainage. Avoid cheap, clay-heavy soil—it compacts easily. Pro tip: Mix in a handful of worm castings for extra nutrients!
How long does it take to see results in a raised bed?
Fast-growing veggies like radishes or lettuce sprout in 3–4 weeks, while tomatoes and peppers take 6–8 weeks. Patience pays off—raised beds warm up faster, so you’ll often harvest earlier than in-ground gardens.
Are raised beds worth the cost compared to in-ground gardening?
Raised beds save time (no weeding or soil prep), boost yields (20–30% more produce), and extend growing seasons. Plus, they’re ideal for small spaces or poor soil. Budget hack: Use cinder blocks or repurposed wood to cut costs.
How do I keep pests out of my raised bed?
Start with healthy soil (strong plants deter pests!) and use row covers or companion planting (e.g., marigolds repel nematodes). For stubborn bugs, try neem oil or introduce beneficial insects like ladybugs. Quick fix: Mulch with straw to block weeds and pests.
Can I grow vegetables in a raised bed year-round?
Not in freezing climates—but with seasonal planning, you can! Use cold-hardy crops (kale, spinach) in winter and row covers for extra warmth. In hot zones, opt for shade cloth. Bonus: Succession planting keeps harvests rolling all year.
Wrapping up and next steps
Raised vegetable gardening is your ticket to a thriving, space-efficient harvest—whether you’re working with a tiny balcony or a modest backyard. By choosing the right layout, maximizing vertical space, and selecting companion plants, you’ll unlock fresh, homegrown produce without the hassle.
Start small, experiment with designs, and watch your confidence (and tomatoes!) grow.
Ready to dig in? Sketch your first raised bed today—plot your plants, gather your tools, and let your garden flourish! 🌱✨